

You can use Arduino to program the Fipsy FPGA. However, be aware, MOST Arduino devices operated at 5 volts, which is enough to fry the 3.3 volt Fipsy device. This means a Logic Level Converter should be used:
Something like this:
https://www.sparkfun.com/products/12009
or this
We are working with 4 data lines with the SPI protocol. The devices above have an HV – high voltage reference, and an LV – low voltage reference, that defines the voltage that each side of the device operates at. Because we need a 3.3V reference voltage, we are supporting the Arduino Uno and Arduino Mega in particular (they have a very useful 3.3V output voltage pin).
Note that in a pinch you can get away with using only resistors to create a voltage level divider circuit, allowing 5V to talk to 3.3V devices (5 volts in to the Fipsy is bad, but 3.3V to a 5V device won’t hurt the 5V device, and should enough for 3.3V to 5V device communication). To figure out what resistors you’ll need use a Voltage Divider Calculator:
http://www.ohmslawcalculator.com/voltage-divider-calculator
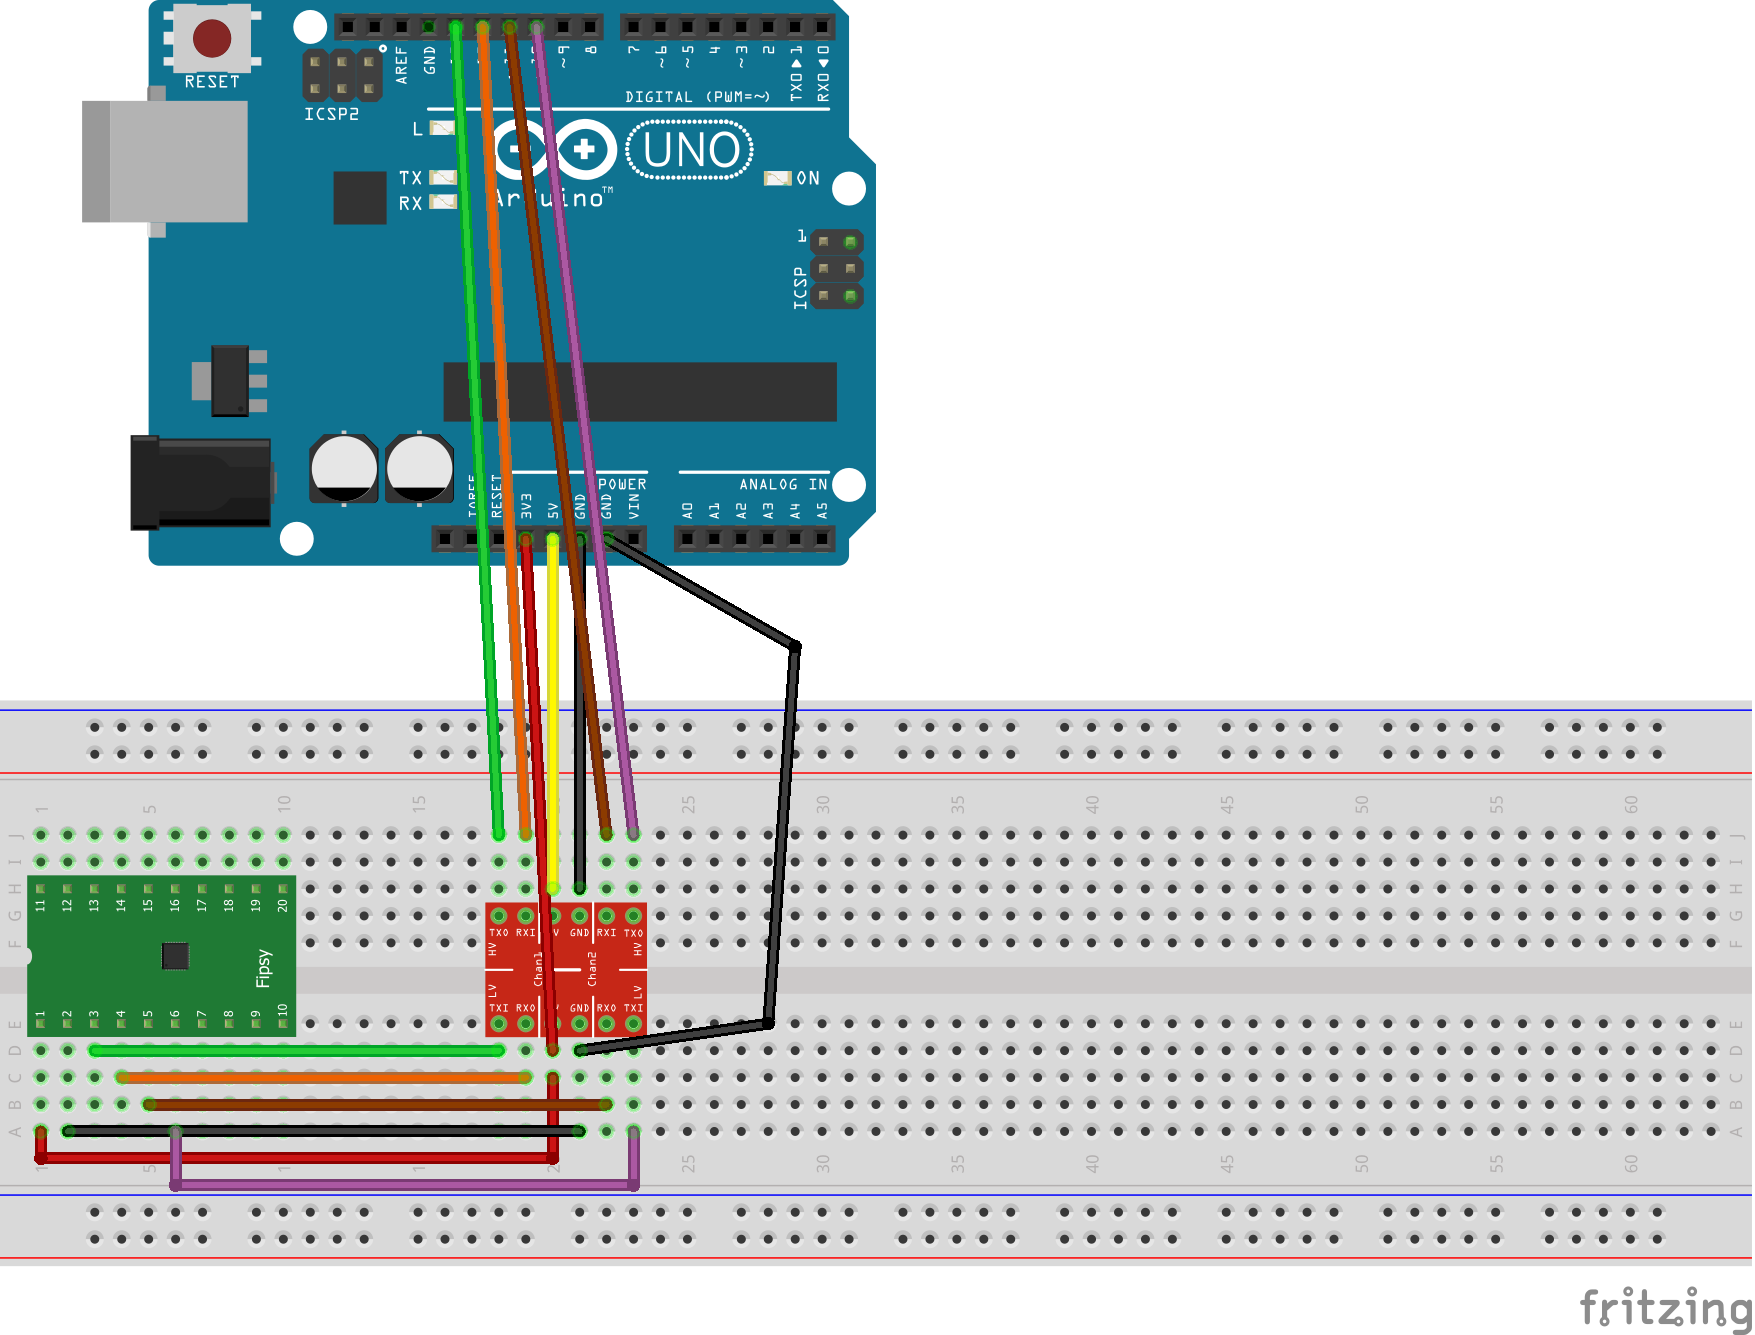
Here is the wiring we will need:
Fipsy Arduino
Pin 1 3.3V ← 3.3V on Arduino Uno
Pin 2 GND ← GND
Pin 3 SCK ← [V Divider] ← Pin 13 (SCK)
Pin 4 MISO → Pin 12 (MISO)
Pin 5 MOSI ← [V Divider] ← Pin 11 (MOSI)
Pin 6 SS ← [V Divider] ← Pin 10 (SS)
For now you need to run the code from command line (later we will add executables for all the major operating systems).
Download these files:
https://github.com/MocoMakers/Arduino-Fipsy-Programmer
You will need to install the Arduino IDE.
Install Python 3.1+
and Install a python module – PySerial
Open your Python 3.1+ and double-check that the following two commands work as intended:
1 2 | from Tkinter import Tk import serial |
Upload the Arduino_Programmer.ino sketch to the Arduino.
Make sure you upload the ‘Arduino_Programmer.ino’ file to your Arduino – note that ‘MachXO2.h’ is a required dependency, so make sure its in the same folder as the .ino file.
Once this is done, keep the USB connected to the Arduino. Take note of what port your Arduino is using in the Arduino IDE, you will want to match that later.
From your command line, change directory to the location of your downloaded folder
For example:
1 | cd C:\PATH\TO\Arduino-Fipsy-Programmer\ |
Then run the script in python:
1 | python FileChooser.py |
First, select the port the Arduino is on from the drop down list (it should match the one in the Arduino IDE).
Next click ‘Check Device ID’.. you should get something like 01 DB 23 88, or a unique id for your device in the command line window. If you get:
FF FF FF FF, then there is a problem with the connection. Check you wiring, and try again.
Now select your .jed file created by Lattice Diamond using the ‘Select your file’ button (if you have one).
Click ‘Program Device’. Note this will erase your current configuration first, then program the new configuration.
If this is your first time programming the Fipsy, check out the first 5 steps of this guide:
If you are having a problem, try starting over and trying again one more time.
Don’t forget, you have access to our Chatroom and Forum.